
How to Make Salt Cured Egg Yolks (Soft or Firm)
Elevate your cooking by learning how to cure egg yolks. It's surprisingly easy and requires just a few ingredients! These cured egg yolks deliver an intense umami flavor with a rich, salty taste. Plus they can be made either soft and jammy or firm for grating over your favorite dishes.
Servings: 14 servings
Calories: 29kcal
Ingredients
For the cured Yolks:
- 2 ½ cups sea salt or kosher salt
- 1 ½ cups granulated sugar
- 7 egg yolks
Optional:
- 1 tablespoon Bonito flakes or miso paste
- 1 tablespoon Lemon zest and ground black pepper
- 1 tablespoon Dried onion and dried garlic powder
- 1 tablespoon Dried thyme, chopped chives or chopped green onions
Instructions
- In a bowl, mix the salt, sugar and the aromatics-if using.
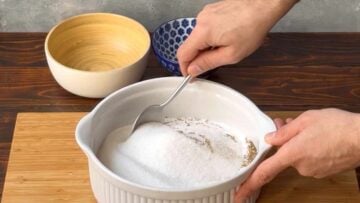
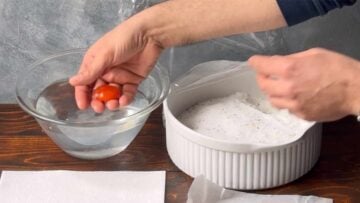
- Transfer half of the curing mixture to a food-safe container and create little wells with the bottom of an egg. Make as many wells as the yolks you will be curing.
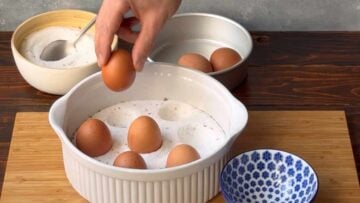
- Brake the eggs and separate the yolks from the whites. Then, gently place the yolks in the created wells.
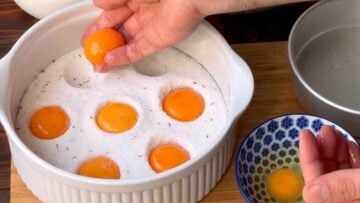
- Sprinkle the remaining salt-sugar mixture over the yolks until fully buried.
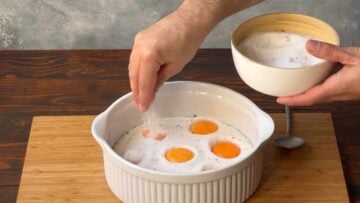
- Curing: Close the container with a lid, or wrap it airtight with plastic wrap and store in the refrigerator to cure.✅ For soft, jammy yolks refrigerate for 16-24 hours.✅ For firm yolks refrigerate for 5-7 days.

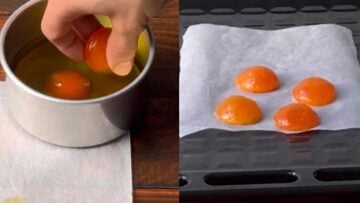
- Once cured to the desired level, remove the dried egg yolks from the salt mixture and gently rinse off the salt with cold water.
- Pat dry with paper towels, and store in the fridge on a piece of parchment paper.

- Optional: Preheat oven to 150°F (65°C).👉 For the firm yolks: Place the cured yolks on a pan lined with baking paper and bake for 80-90 minutes, until the yolks are dry to the touch and firm (flip them once after 50 minutes).👉 For the soft yolks: Add the yolks to a small baking dish, cover with vegetable oil ( i use olive oil) and make sure they’re completely submerged. Bake for 45 minutes. Turn the oven off and let them sit for 15 more minutes inside the oven. This method will keep them more soft than baking them on a pan.
Video
Notes
Nutrition: Serving size is estimated as half a yolk. Salt and sugar are not included in nutrition facts since there's no way to know how much of each is absorbed by the yolks.
Salted duck egg yolks provide an even more intense umami flavor and creamier texture because duck eggs tend to be richer and slightly larger than chicken eggs. Because of their size, they may need an extra day or two for a firmer cure. If you're aiming for soft-cured yolks, the same curing time should work (18-24 hours), but for firm yolks, extending the cure 1 more day will yield better results.
Pasteurization in the oven will remove some of the umami flavor of the yolks and is not necessary if you already used pasteurized eggs.
I have found that 150°F (65°C) is the "sweet spot" for baking the yolks because, at this temperature, holding them for more than 30 minutes ensures pasteurization while keeping the yolk's consistency unchanged. This works because egg yolks begin to coagulate at temperatures above 150°F (65°C), so staying at or below this threshold preserves their texture.
Food Safety Instructions:
Here are some food safety instructions to keep in mind when making salt-cured egg yolks:- Use fresh eggs from a trusted source – This reduces the risk of contamination with pathogens like salmonella, but it does not eliminate it entirely.
- Use pasteurized eggs – If you don’t plan to dehydrate the yolks in the oven, I highly recommend using pasteurized eggs, especially for soft-cured yolks or shorter curing times. Pathogens can survive the curing process if not properly handled.
- Consider dehydrating the yolks in the oven – While salt curing preserves yolks, baking them at low heat (around 175°F/80°C) for 30 minutes further reduces bacterial risk.
- Be cautious with high-risk individuals – If you use unpasteurized eggs and don’t bake or dehydrate the yolks, avoid serving them to children, pregnant women, the elderly, or those with weakened immune systems due to the small but present risk of foodborne illness.
- Practice good hygiene – Always wash your hands, clean utensils, and work surfaces before and after handling raw eggs.
More umami recipes:
- Quick pickled red onions
- How to Roast Garlic in the Oven
- Healthy Mediterranean potato salad with boiled eggs (Nicoise).
Nutrition
Calories: 29kcal | Carbohydrates: 0.3g | Protein: 1g | Fat: 2g | Saturated Fat: 1g | Polyunsaturated Fat: 0.4g | Monounsaturated Fat: 1g | Cholesterol: 97mg | Vitamin A: 130IU | Calcium: 12mg | Iron: 0.2mg
