
Do you want to make your pumpkin pies and baked goods tastier with minimal effort? This homemade pumpkin puree recipe with fresh pumpkin (or squash) is the key! Also works with leftover pumpkin, plus it freezes very well!

Jump to:
Did you make a vegan pumpkin soup with red lentils and have some leftover pumpkin? Or maybe you tried this easy butternut squash soup with sweet potato and you have half a squash left.
One of the best things you can do is to roast it in the oven until fork-tender and then blend it to transform it into the most delicious, luxurious puree which is far superior than the canned stuff.
Use this puree for all your pumpkin dessert recipes such as an easy pumpkin pie with condensed milk, bars, tarts, cakes and cookies or add it to savory recipes such as pasta sauces, creamy risottos and pumpkin buns (dinner rolls) to give them an autumn vibe.
For alternative methods, make sure to read the "expert tips" section to see how you can make this recipe without oven or without food processor.
😍 Why this recipe works
This easy roasted pumpkin purée from scratch checks all the boxes:
Easy: No need to peel the pumpkin, just cut it in the middle, or into smaller pieces (for larger pumpkins) and bake in the oven.
Tasty: Homemade puree tastes so much better than the canned pumpkin puree. Once you try it, there's no going back!
Fresh: Made from seasonal, fresh pumpkins, this homemade pumpkin puree ensures a more vibrant and authentic flavor than the canned type.
No Additives: Making it from scratch allows you to control what goes into the recipe, avoiding all the harmful additives or the extra salt/sugar.
Customizable: Can be made with any type of pumpkin or squash. Whole pumpkin, leftover pieces, even jack-o-lantern (if still fresh) can be used.
📋 Ingredients
You only need one ingredient for this recipe, and this is, of course, pumpkin. Any type will do, so make sure to choose your favorite!

Here, I've used Musquee de Provence also known as fairytale pumpkin (the big one on the left) and butternut squash (the smaller one on the right).
Sugar pumpkins, also known as pie pumpkins, will work very well because they have sweet and creamy flesh.
A personal favorite is Hokkaido squash (also known as red kuri squash) because it will give your recipes savory chestnut notes.
Other times I just pick what I can find at the moment or mix 2 or 3 different varieties including butternut squash or kabocha squash.
Jack-O-Lantern will also work, though they're not as sweet as other varieties and can also be stringy and coarse.
For more varieties, the pioneer woman has a helpful article about the differrent types of pumpkin you may find this fall.
🔪 Step-by-step Instructions
Follow this easy step-by-step guide to make perfect roast pumpkin puree every time:

Step 1: Wash and clean the squash very well. Then, trim the stem and place it on a level surface with the stem facing down (image 1). Using a large sharp knife cut it in the middle. If the stem is too hard to cut through with the knife, just use your hands to pull the two pumpkin halves apart (image 2). If the pumpkin is too big, cut each half into smaller pieces.
For smaller squash, just cut-off the stem and cut the squash in the middle.

Step 2: Using a scoop or a spoon (image 3), scrape out the pumpkin guts (seeds and pulp). It's okay if there are some strings left. Then, place the pieces on a baking sheet lined with parchment paper (image 4), pierce the outer skin with a fork or knife several times and bake in the oven.
Usually you roast the pumpkin cut-side down, but I've also done it with cut-side up with no problems.

Step 3: When the pumpkin is fork tender (if you pierce the skin with a fork, it penetrates the flesh without resistance - image 5) take it out of the oven and let cool until easy to handle. Then, scrape the flesh with a spoon (image 6). You can also peel the skin with a sharp knife.

Step 4: Transfer the pieces to a food processor (image 7) and process until smooth (image 8). You can also use a blender or a food mill.

Step 5: If the puree is watery, place a large strainer over a bowl and line it with a piece of cheesecloth. Pour the puree on the cheesecloth (image 9) and strain it until most of the liquid is drained (image 10).
Straining will most likely be required for larger pumpkins. You may not need to strain the puree if you use small sugar pumpkins. In most cases, you'll have to use your intuition as for how long you should strain it. As a rule, when it seems not too watery, then it's fine.
👨🍳 Expert Tips
Stronger flavor: Let the pumpkin bake in the oven until it collapses. Don't be afraid if the skin looks burned. You can also roast it cut-side up, but keep an eye on it, and if you notice that the flesh gets very brown, flip it over.
Easy scraping: It's much easier to scoop out the pumpkin meat while it's still warm.
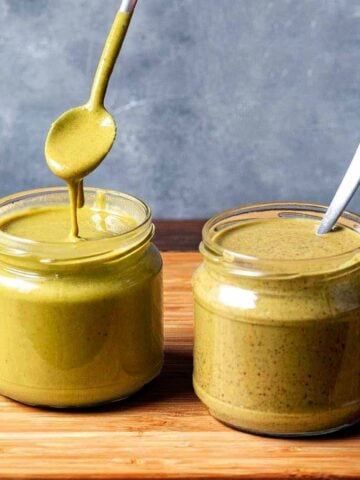
Freezing: I suggest filling freezer-safe bags with 15 oz (425 grams) of puree, because this is the standard weight of one canned pumpkin that so many pumpkin recipes ask for. Alternatively, you can freeze it in 1-cup portions.
Using leftover pumpkin: If there is no skin to protect the flesh from burning, cover with aluminum foil and bake until tender.
Quick straining method: Take a big piece of cheesecloth and place it in a bowl. Pour the pumpkin puree onto the cheesecloth. Hold the edges of the cheesecloth and lift it up, then twist it to wrap the puree inside. Keep twisting until you see the juice coming out.
Without oven: Peel the pumpkin and cut it into large pieces. Boil or steam in a large pot until tender, drain and puree. Strain as suggested in the recipe. Keep in mind that boiling will result in a pumpkin purée with less flavor.
Without food processor: If you don't have a food processor you can also use a high speed blender (if it has a taper even better) or a mini chopper. Another option is to use a food mill, however this method may not produce the smoothest results.
If you use a Jack-O-Lantern pumpkin and the puree seems coarse, blend it again after straining to make it smoother.

💭 FAQs
Rinse them well with cold water, pat dry with kitchen paper and bake for 20-30 minutes at 325°F (165° C) or until crisp and golden brown.
Let the seeds cool completely before transferring to an airtight container.
Add it to smoothies, cocktails and mocktails or use it to make a brown sugar pumpkin spice syrup for your lattes.
Another option is to freeze it in ice cube trays. Once frozen, store the cubes in a zip-top bag and use them in future pumpkin recipes such as soups and sauces.
Yes, real pumpkin, when cooked and pureed, can be used instead of canned puree.
Keep in mind that we're talking about 100% pure pumpkin puree which is not the same as pumpkin pie filling. Canned pumpkin pie filling contains additional ingredients like sugar, spices, and thickeners.
Yes, any kind of fresh pumpkin can be used for puree, cooking and baking, but depending on the type you may get different results.
For the best results use sugar pumpkins because they're smaller, easier to handle, and produce creamier and more flavorful results.
In many cases, the larger the squash, the more stringy and watery it will be.


If you tried this Homemade Pumpkin Puree Recipe or any other recipe on my website, please leave a 🌟 star rating and let me know how it went in the 📝 comments below. I love hearing from you!
📖 Recipe

Homemade Pumpkin Puree (for Pies & Baking)🎃
Ingredients
- 6 pounds (2.7 kg) fresh baking pumpkin ( or squash)
Instructions
- Wash and clean the pumpkin very well and preheat your oven to 390°F (200° C).Trim the stem and place the pumpkin on a level surface with the stem facing down. Using a large sharp knife cut it in the middle.If the stem is too hard to cut through with the knife, use your hands to pull the two pumpkin halves apart. If the pumpkin is too big, cut each half into smaller pieces.For smaller pumpkins, just cut-off the stem and cut them in the middle.
- Using a scoop or a spoon, scrape out the pumpkin guts (seeds and pulp). It's okay if there are some strings left.Place the pieces on a baking sheet lined with parchment paper and pierce the outer skin with a fork or knife several times.Bake in the oven until fork-tender (when you pierce the skin with a fork, it should penetrate the flesh without resistance). This can take from 45 minutes up to 2 hours depending on the pumpkin variety and size.
- Once the pumpkin is fork tender, take it out of the oven and let it cool until easy to handle. Then, scrape the flesh with a spoon or remove the skin with a knife.
- Transfer the pieces to a food processor and process until smooth. You can also use a blender or a food mill.
- If the pumpkin puree is watery, place a large strainer over a bowl and line it with a piece of cheesecloth. Pour the puree on the cheesecloth and strain it until most of the liquid is drained.Straining will most likely be required for larger pumpkins. You may not need to strain the puree if you use small sugar pumpkins.
Notes
- You can roast the pumpkin cut-side down or cut-side up, the outcome will be almost the same. If you do it cut-side down it will be just a bit quicker, because the pumpkin steams from the inside. If you do it cut-side up, it will have a bit more roasted flavor.
- For a stronger flavor, let the pumpkin bake in the oven until it collapses. Don't be afraid if the skin looks burned.
- It's much easier to scoop out the pumpkin meat while it's still warm.
- In most cases, you'll have to use your intuition as for how long you should strain the puree. As a general rule, when it seems not too watery, then it's fine.
- If you use a Jack-O-Lantern Pumpkin and the puree seems coarse, blend it again after straining to make it smoother.
- I suggest freezing the puree in 15 oz (425 grams) portions, because this is the standard weight of one canned pumpkin that so many pumpkin recipes ask for.


Leave a Reply