
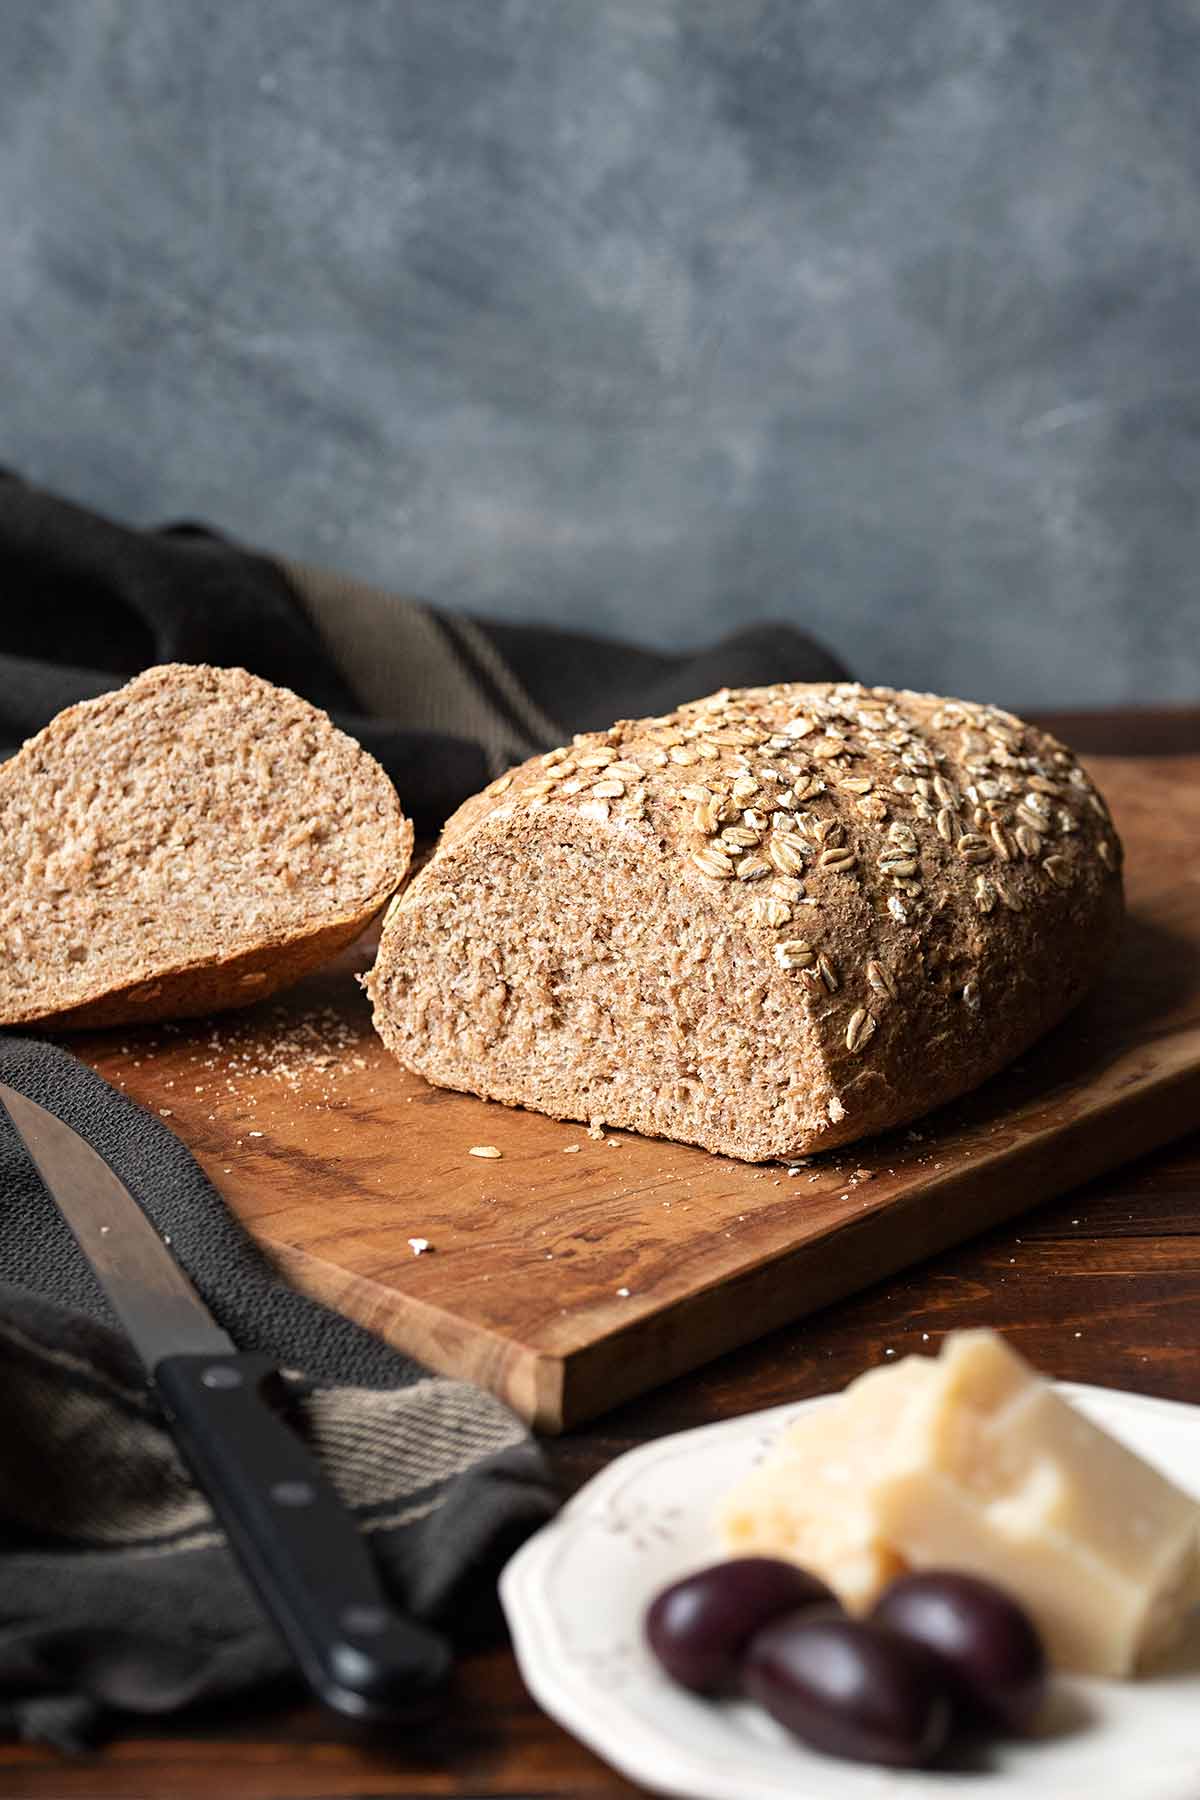
Learn how to make a simple and easy whole wheat bread. This homemade bread recipe requires dry yeast (for ease) but you can also make it with sourdough if you're an experienced baker. It will surely earn a place among your favorite bread recipes.
Jump to:
Also known as wholemeal or wholegrain bread this loaf is not only ideal for whole wheat sandwiches, but it's also Mediterranean Diet friendly and the perfect company to many dishes, from soups and stews to dishes with legumes.
Don't miss my other delicious Greek bread recipes like this Greek village bread (horiatiko psomi) which is a type of white bread made with durum wheat (semola) flour, this homemade Greek pita bread cooked on a cast iron skillet (or in the oven) and this amazing carob and whole wheat bread with walnuts.
😍 Why I love this bread recipe
Easy: If you're new to bread baking, the use of dry instant yeast, the easy-to-work-with dough and the simple baking method make this one of the easiest whole wheat bread recipes.
Delicious taste: Just a bit of olive oil makes this bread extra moist, while a touch of honey (or maple syrup for vegans) complements the flavor perfectly.
Mediterranean Diet friendly: The Mediterranean Diet is all about whole grains, and this healthy, 100% whole wheat bread is the epitome of this philosophy.
📋 Ingredients
For this easy homemade bread recipe, you'll need the following simple ingredients:

Whole wheat flour: I prefer to use 100% whole wheat flour but you can also use 50% whole wheat and 50% bread flour.
Active dry yeast: you can also use fresh yeast. 1 tablespoon dry yeast equals to 0.88 oz (25 grams) fresh yeast.
Olive oil: In Greece we like to use olive oil for most of our bread recipes, but you can also use softened butter if you prefer.
Honey: Any type of honey will do. If you're vegan you can use maple syrup or grape syrup (petimezi in Greek).
🥣 Substitutions - Variations
Dutch oven: For a crustier bread, preheat your oven very well (with the Dutch oven inside) and when ready, transfer the bread into the Dutch oven and bake. Take the lid off the last 10 minutes to get that browned surface.
Loaf pan: if you make a lot of sandwiches, bake the bread in a loaf pan to get that signature look of sandwich bread.
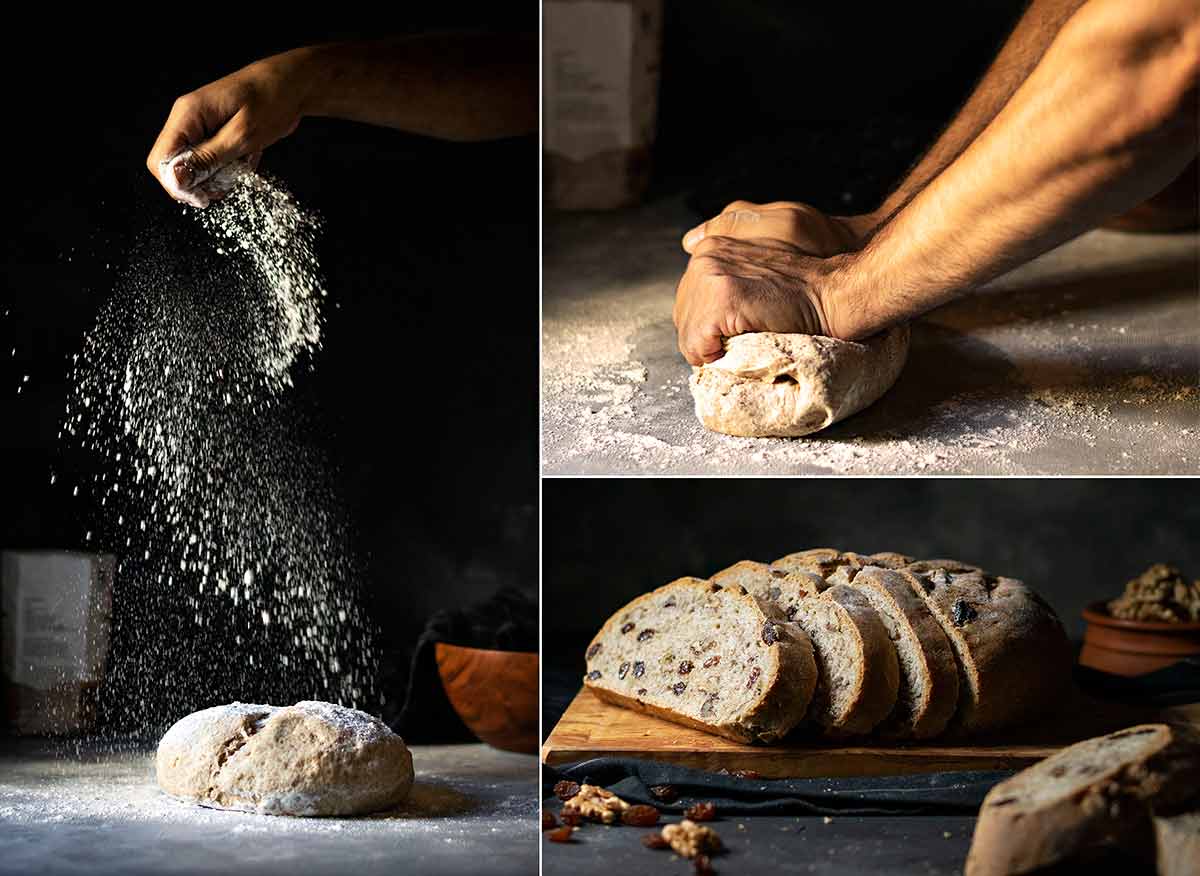
With walnuts and raisins. Because wholegrain flour has nutty, earthy notes, it goes very well with some walnuts and raisins added. Add them to the dough just before you shape it into a loaf.
Sourdough: If you're an experienced baker, you can omit the yeast and make it with sourdough. This 100% Whole Wheat Sourdough (recipe by theperfectloaf.com) is very good.
Einkorn flour: For an even healthier bread, part of the flour can be substituted with einkorn flour. In most recipes einkorn can be substituted cup for cup with regular whole wheat flour (even better if you measure by weight), however I haven't tested this variation, so I can't provide further info. Please let me know in the comments if you've tried this type of flour!
This article what is Einkorn Flour and How to Use it (by wellnessmama.com) provides further info.
🔪 Instructions (Steps)
Follow this easy step by step guide to make the best, 100% whole grain bread:
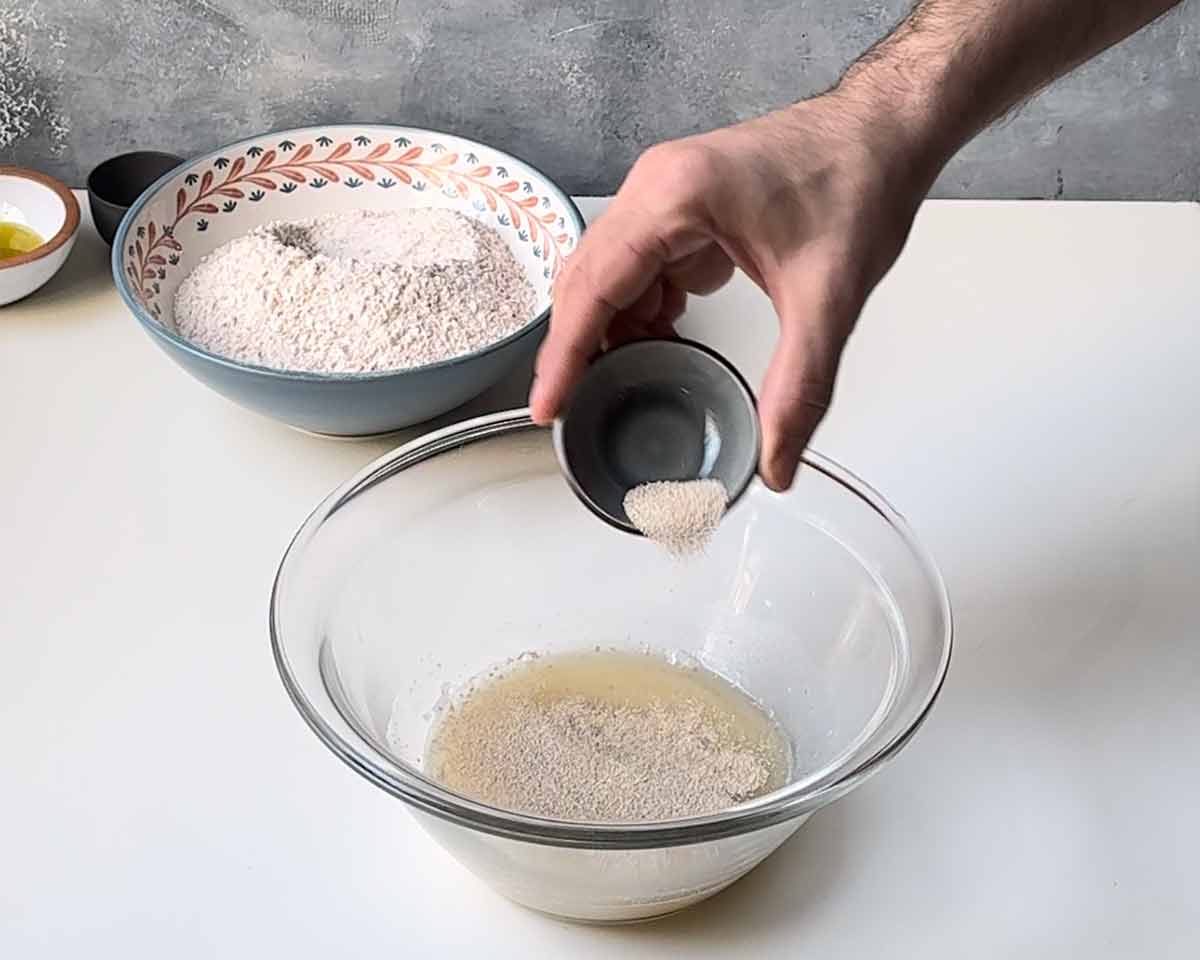
Add the water, the honey, the yeast and one tablespoon of the flour to a large bowl and mix to combine. Let the mixture stand for 10-15 minutes until foamy.
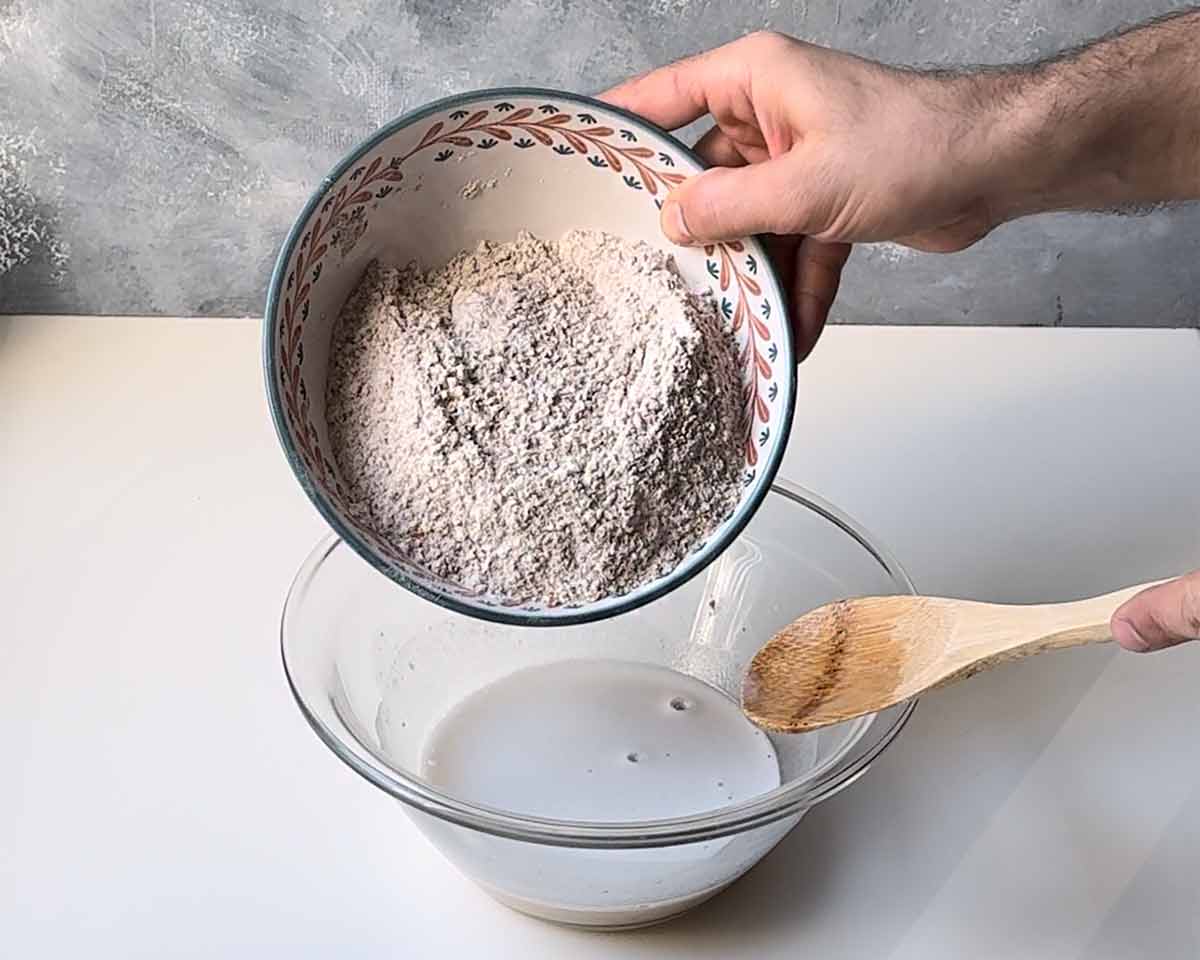
Mix the flour and the salt in another bowl. Then, add the flour to the yeast mixture.

Stir with a wooden spoon (or mix by hand) until the flour absorbs all the liquid. No need to knead the mixture at this point. Cover it with a wet towel and leave it in a warm place until tripled in volume.
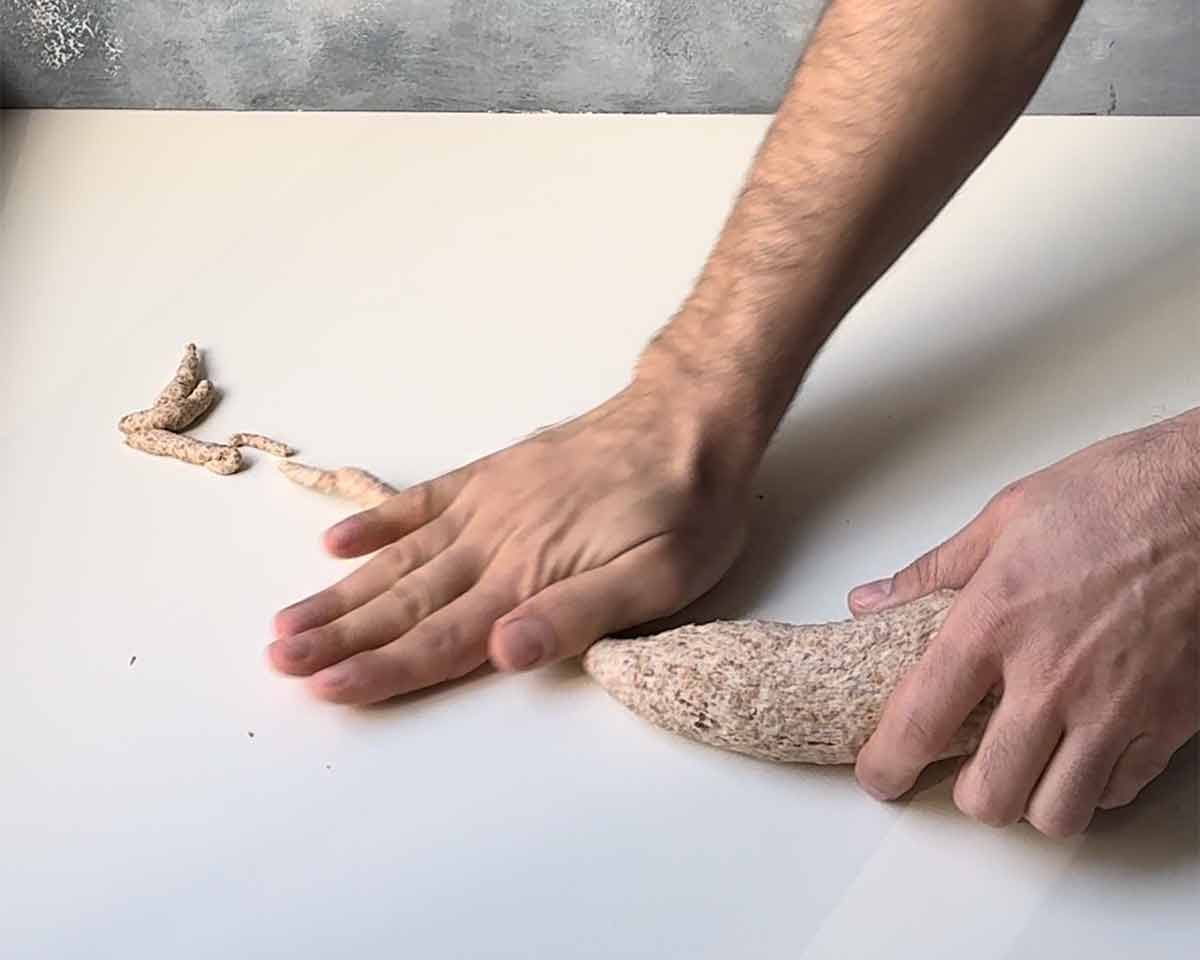
Knead the dough until it becomes soft and elastic. You can do this by hand or using a stand mixer using the dough hook. Your aim is to develop the gluten and the dough to be no more sticky.
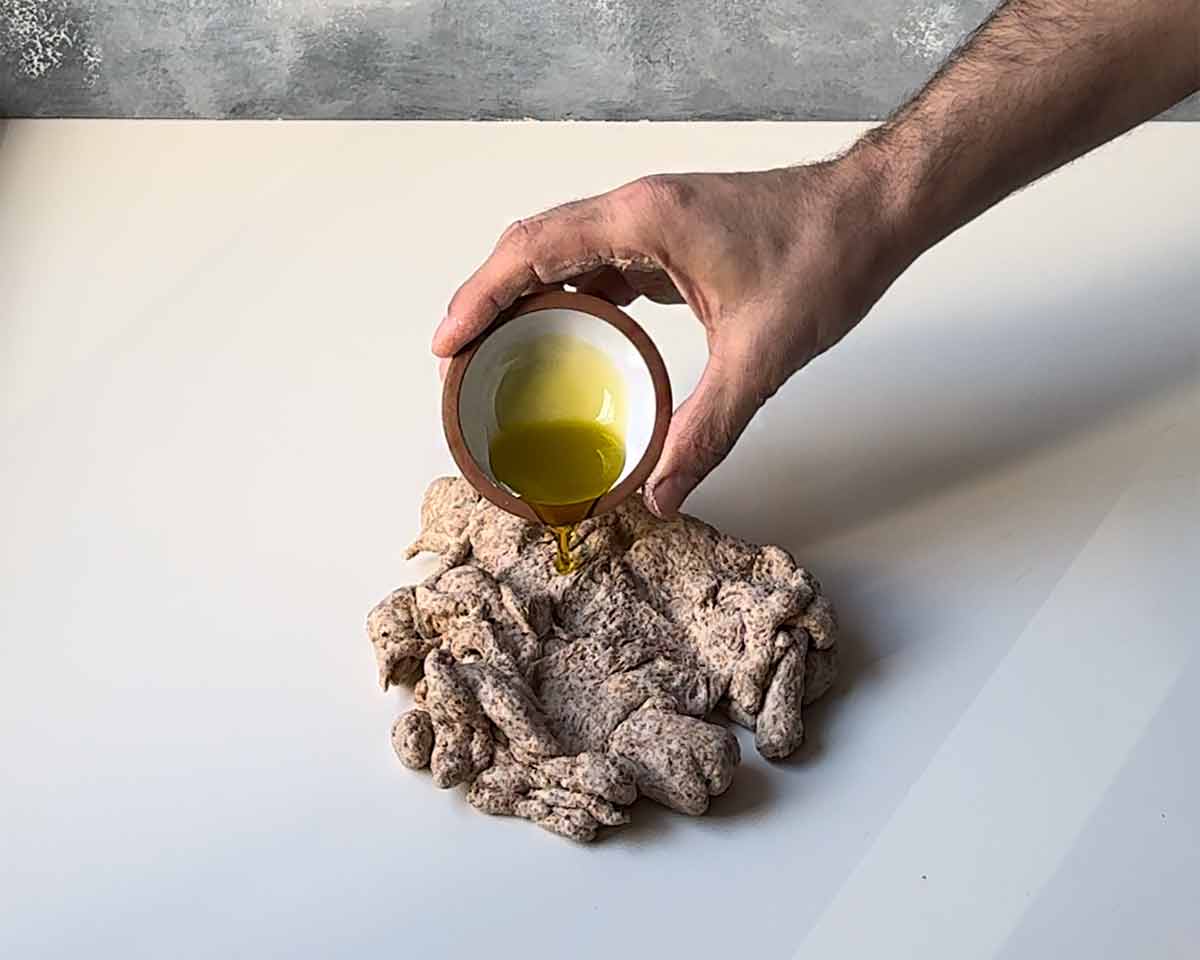
Add the olive oil and gently knead some more until combined. At this stage you can also add some chopped walnuts and raisins if you prefer.
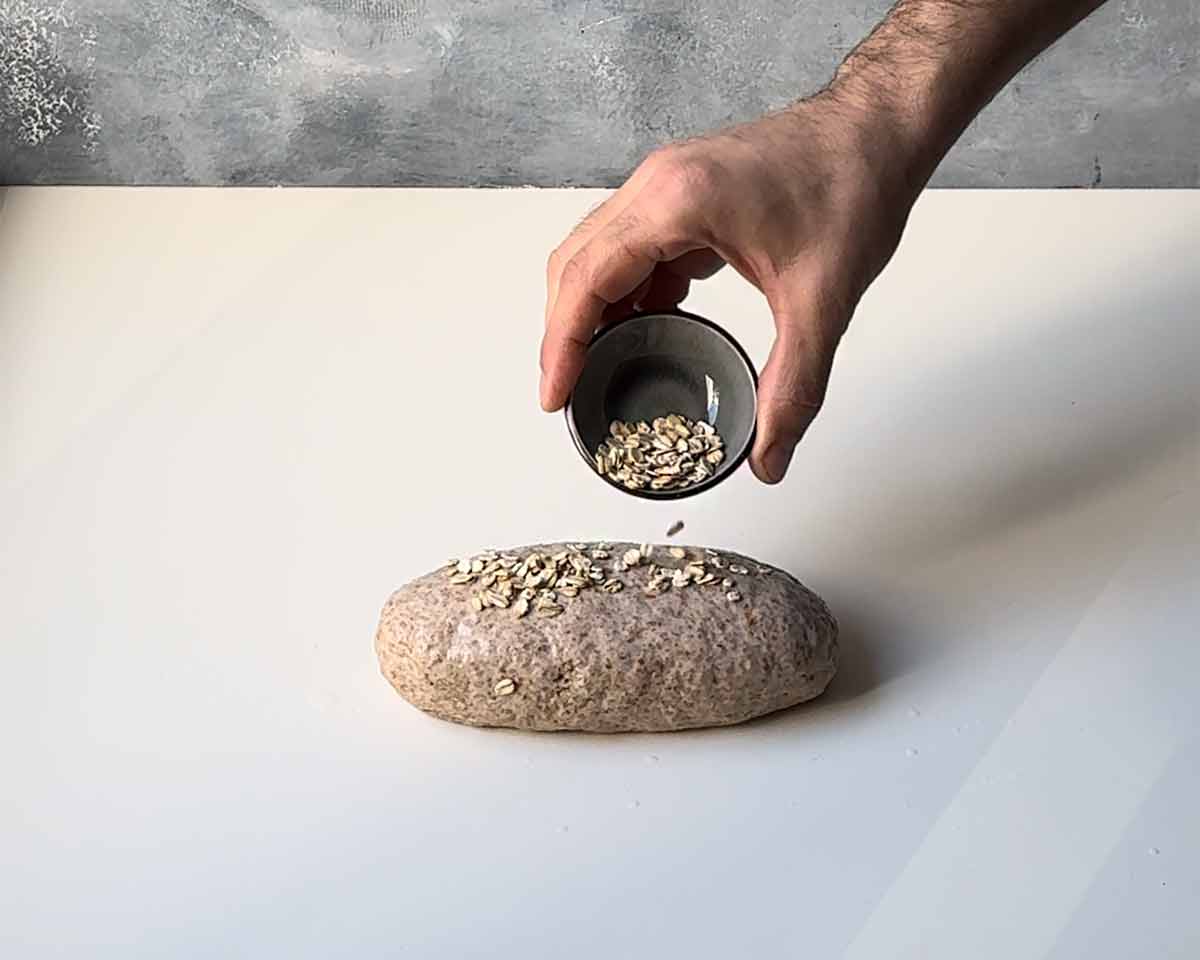
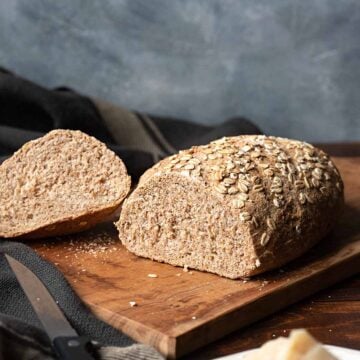
Shape the dough into two small loaves or a large one, and (optionally) brush it with some water and sprinkle over some oat flakes. Transfer the bread on a baking sheet lined with parchment paper, cover with a dump towel and let it at room temperature until doubled in size.
(In these photos I'm doing half the recipe so I'm making just one small loaf).
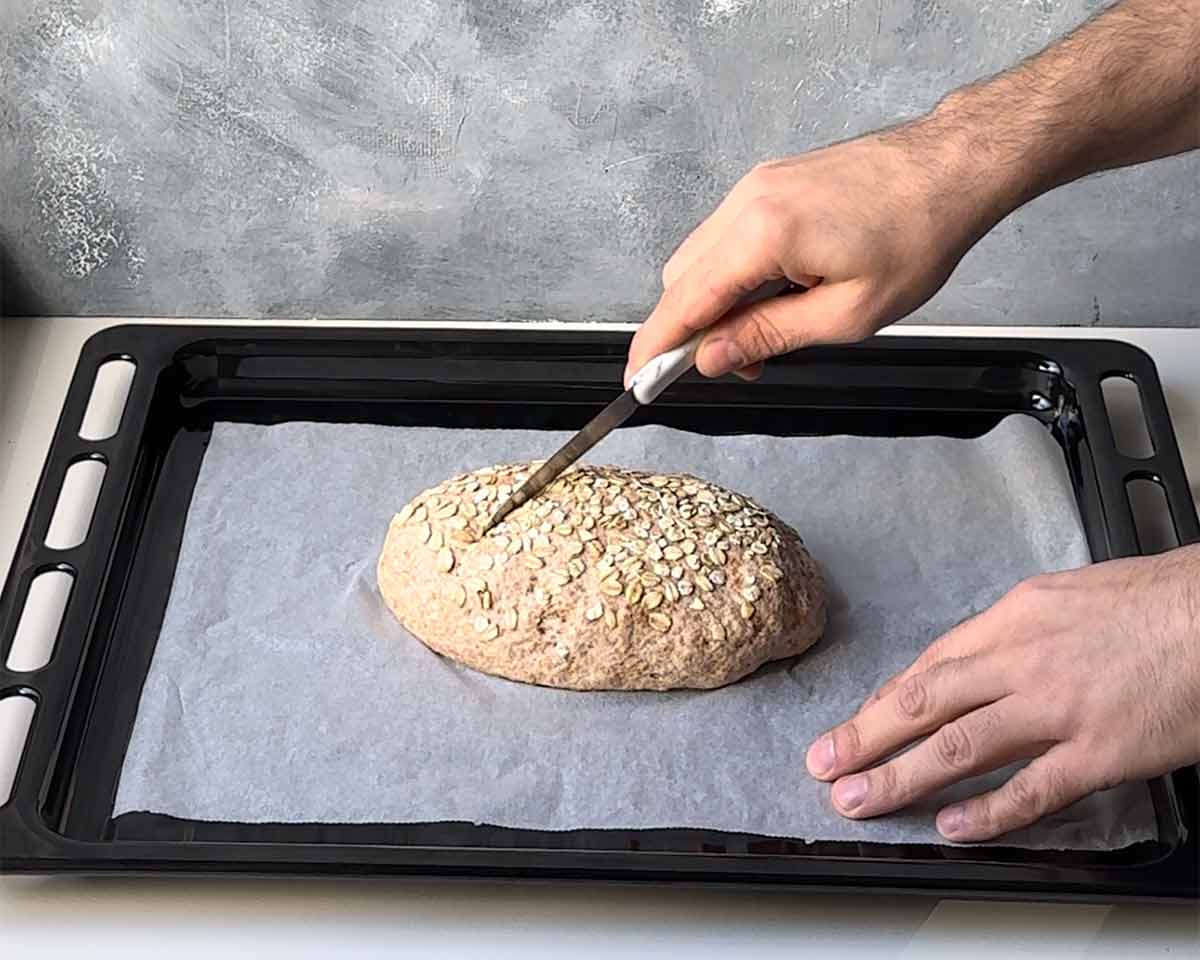
Score the surface with a sharp knife and bake in a preheated oven until lightly browned. Remove from the oven and let it cool on a rack before you slice it.
👨🍳 Expert Tips
✤More flavor - slow maturation: If you have the time, you can leave the dough to rise, and store it in the refrigerator overnight. This will enhance the taste of the bread. The next day, let it come to room temperature, shape the loves, let them double in volume and bake as instructed.
✤ Better crust: The basic recipe is kept as simple as possible, however there are a few things you can do for a better crust. You can throw a few ice cubes, place a small pan with boiling water in a corner of your oven or just generously spray the loaves with water before baking. This provides steam which makes the bread more crusty.
✤ Proof the yeast (just to be sure): I always like to proof the yeast by sprinkling it over the warm water where I've added a bit of flour and the honey. It takes just 15 minutes and it will save me time in the unlikely case that the yeast is dead.
💭 FAQs
The best (and probably most used) grain for bread making is wheat. Whole wheat is used for centuries for making bread and it's a vital food in many cultures.
Whole grain bread is considered healthier than white bread because it has more fiber and doesn't raise your insulin levels as fast and as high. Additionally, it contains more nutrients.
Yes, of course. 100% whole grain bread is very easy and simple to make, and it also tastes delicious. A traditional Greek whole grain bread is the Cretan Dakos which is used to make the famous Dakos salad
What to serve with:
You can serve this whole grain bread with every meal but it can also be served with meze dishes such as this Greek Tirokafteri (a spicy feta dip), this Greek tzatziki (a garlicy yogurt dip) and this taramosalata (Greek fish roe dip).
It also shines with this simple olive oil bread dip!
🍳 More Bread Recipes


If you tried this easy Greek recipe for 100% Whole Wheat Bread or any other recipe on my website, please leave a 🌟 star rating and let me know how it went in the 📝 comments below. I love hearing from you!
🎥Recipe Video
Please note that in the following video I make half a recipe.
📖 Recipe
100% Whole Wheat Bread (Easy Greek Recipe) 🥖
Ingredients
- 4 cups (500 g) whole wheat flour
- 2 ½ teaspoons (8 g) active dry yeast
- 1 ¼ cups (300 g) water (warm but not hot)
- 2 tablespoons (24 g) olive oil (extra virgin)
- 2 tablespoons (36 g) maple syrup (or honey for non vegans)
- 1 ½ teaspoon (7 g) fine salt
- Oat flakes for the surface (optional)
Instructions
- Add the water, the honey (or maple syrup), the yeast and one tablespoon of the flour to a large bowl and mix to combine.Let the mixture stand for 10-15 minutes until foamy.
- Mix the rest of the flour and the salt in another bowl. Then, add the flour to the yeast mixture and stir with a wooden spoon until the flour absorbs all the liquid.No need to knead the mixture at this point, cover it with a wet towel and leave it in a warm place until tripled in volume.
- Knead the dough until it becomes soft and elastic. You can do this by hand or using a stand mixer using the dough hook. Your aim is to develop the gluten and the dough to be no more sticky.
- Add the olive oil and gently knead some more until combined. At this stage you can also add some chopped walnuts and raisins if you prefer.
- Shape the dough into two small loaves or a large one, and (optionally) brush it with some water and sprinkle over some oat flakes.
- Transfer the bread on a baking sheet lined with parchment paper, cover with a dump towel and let it at room temperature until doubled in size.Preheat your oven to 390°F (200°C).
- Score the surface of the loaf with a sharp knife and bake in the preheated oven for 30-35 minutes for two small loaves or for 50-55 minutes for 1 large loaf.Remove from the oven and let it cool on a rack before you slice it.

Akhila@Pepper Delight says
OMG, this bread and the crust and the photos..it just looks AMAZING!!! Cant wait to try this one!
Makos says
Thank you!
Claire says
Hello,
it looks amazing, thanks for the reciepe
I’d like to ask you for permission to use 1 of photo (the one with the flour) and print it. would that be ok?
Thank you
Julia Zirpel says
Hello, looks great. Where is the picture with the flour from? Do you know the photographer?
Thank you
Makos says
Hi Julia,
All photos are taken by me 🙂
Weiwei says
Tried this recipe yesterday. The bread’s soooooo good with perfect crust and texture. Thank you for sharing this amazing recipe.
Makos says
Thank you for trying it! I'm very happy you liked it ?
Da Cipriano says
Hi. I really like your site and posts, the recipes and images are fantastic and inspiring. I will try it. Keep up the good work and stay safe!! Da Cipriano
Makos says
Thank you very much!
Bob says
Wonderful bread. Great recipe.
You’ve really explain the approach and the whys very clearly. A very thoughtful approach. And you presentation with accompanying photos is beautiful. This is the first time I have seen your sight but having looked around a bit I know I will be back frequently.
Thank you for the delicious bread and the inspiration.
Makos says
Thanks for the kind words Bob!
It's been some time since I made this bread and I think I will make it again next weekend. So, also thanks for reminding me!
Megan Cunningham says
How would you adjust this for high-altitude baking (7000 ft)?
Makos says
Hi Megan, I honestly don't know. Until now I had the impression that baking cakes were mostly affected by high altitude, I thought that bread had no problem. If you have a simple bread recipe you trust, use the temperature and baking time of that recipe. I think that would do 🙂
Rosario Brondolo says
Did not work at all for me …😩
Makos says
Hi Rosario, sorry to hear that!
Can you tell me what went wrong?
Alex says
This bread looks great and I want to try making it.
A couple of questions:
How long does it usually take for the dough to double in size, so it’s ready for baking?
What kind of baking pan is meant to be used for baking this bread? There are so many shapes and sizes of baking pans. Some are made for breads, some are wide and flat. Does it matter? Could I just shape it into a boule and bake it on a baking sheet?
Makos says
Hi Alex, it usually takes 60-90 minutes. You can gently press the dough with your finger and if it springs back it is ready.
A baking sheet is great if you shape it into a boule! Just for your information, I've also had very good results when I baked it into a Dutch oven.
Good luck!